
Who am I?
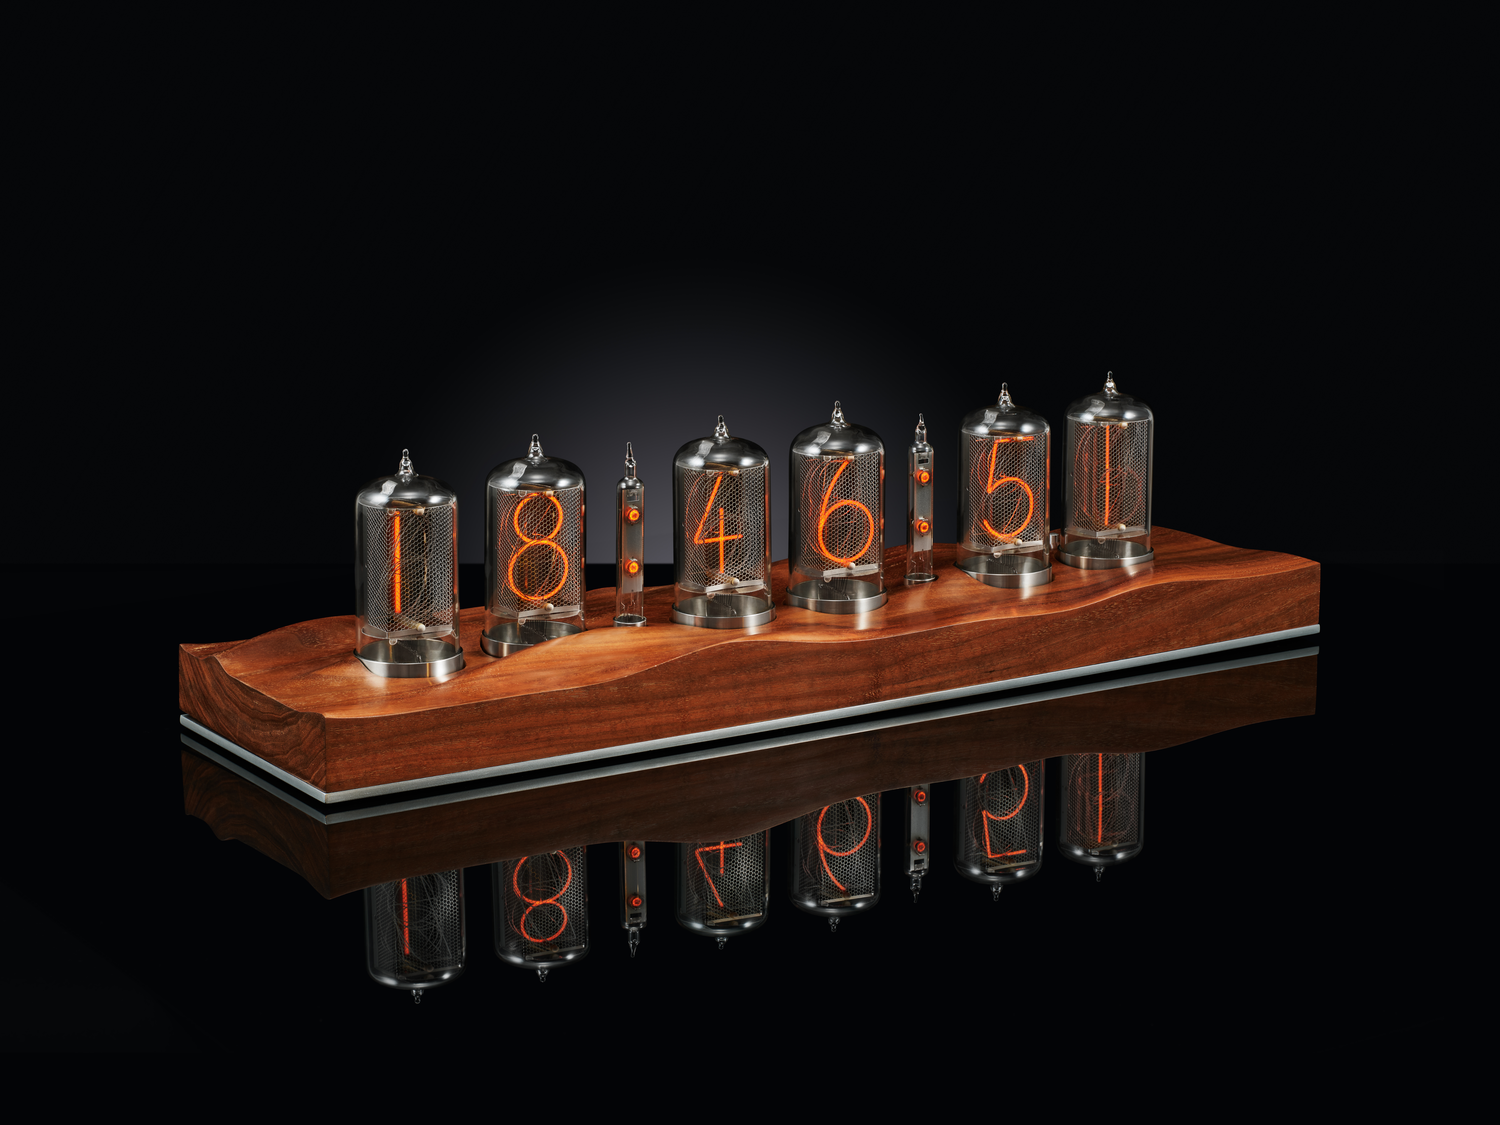
Walnut Nixie Clock
This Walnut Nixie clock features Dalibor Farny Nixie tubes, custom-designed electronics, and a solid Walnut body with smooth, wave-like contours that complement the neon glow.
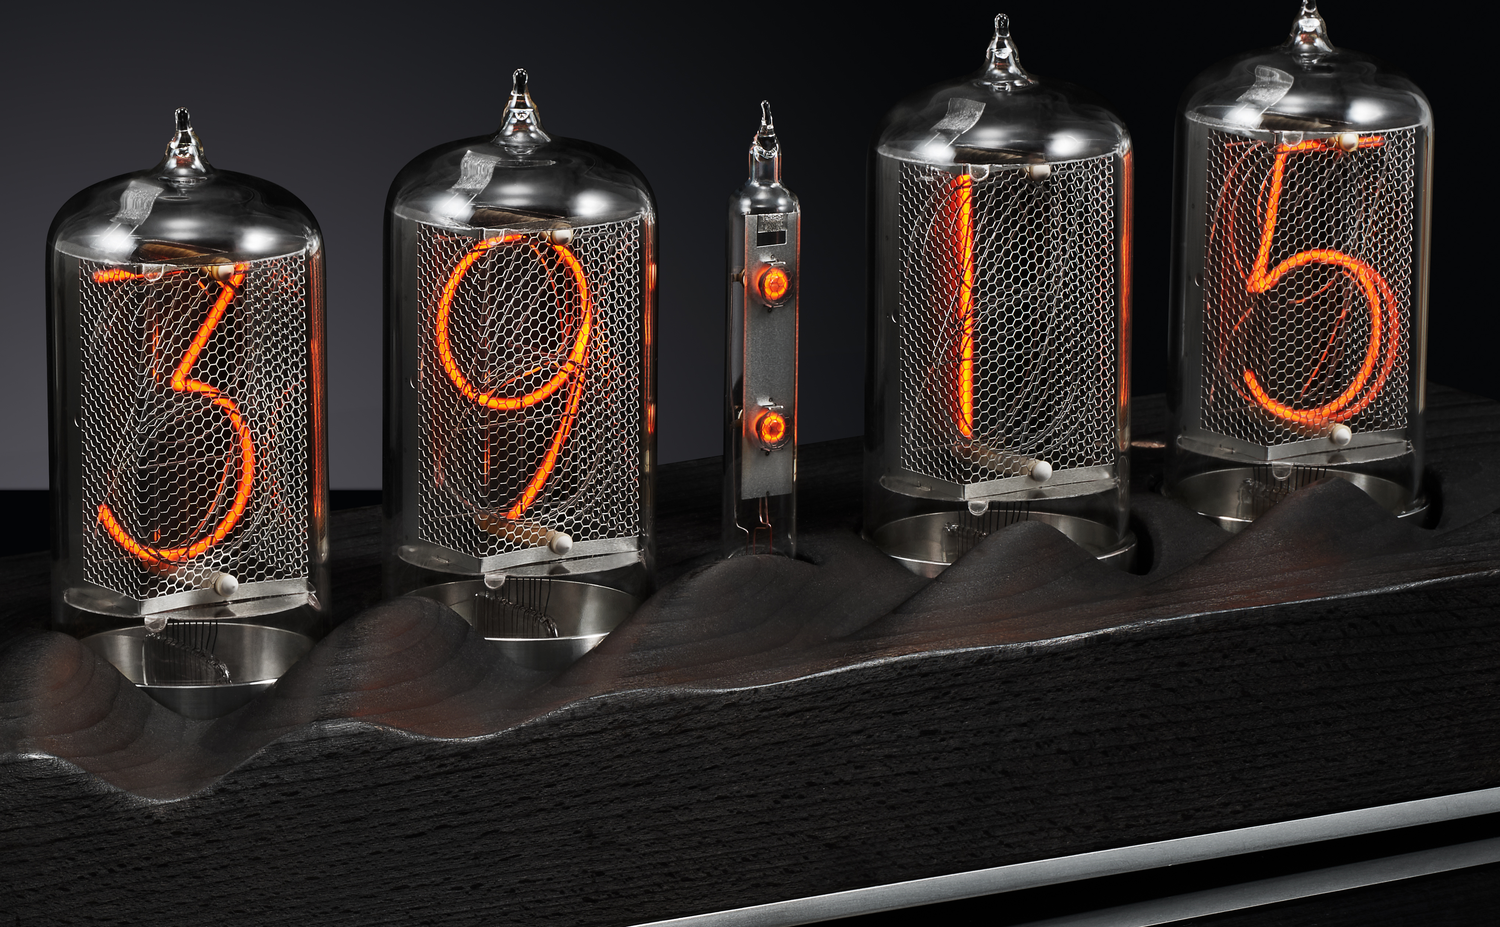
Burnt Beech Nixie Clock
This Nixie clock rests on a burnt-black Beech wood base, carefully sanded and waxed to reveal a rich, deep grain.
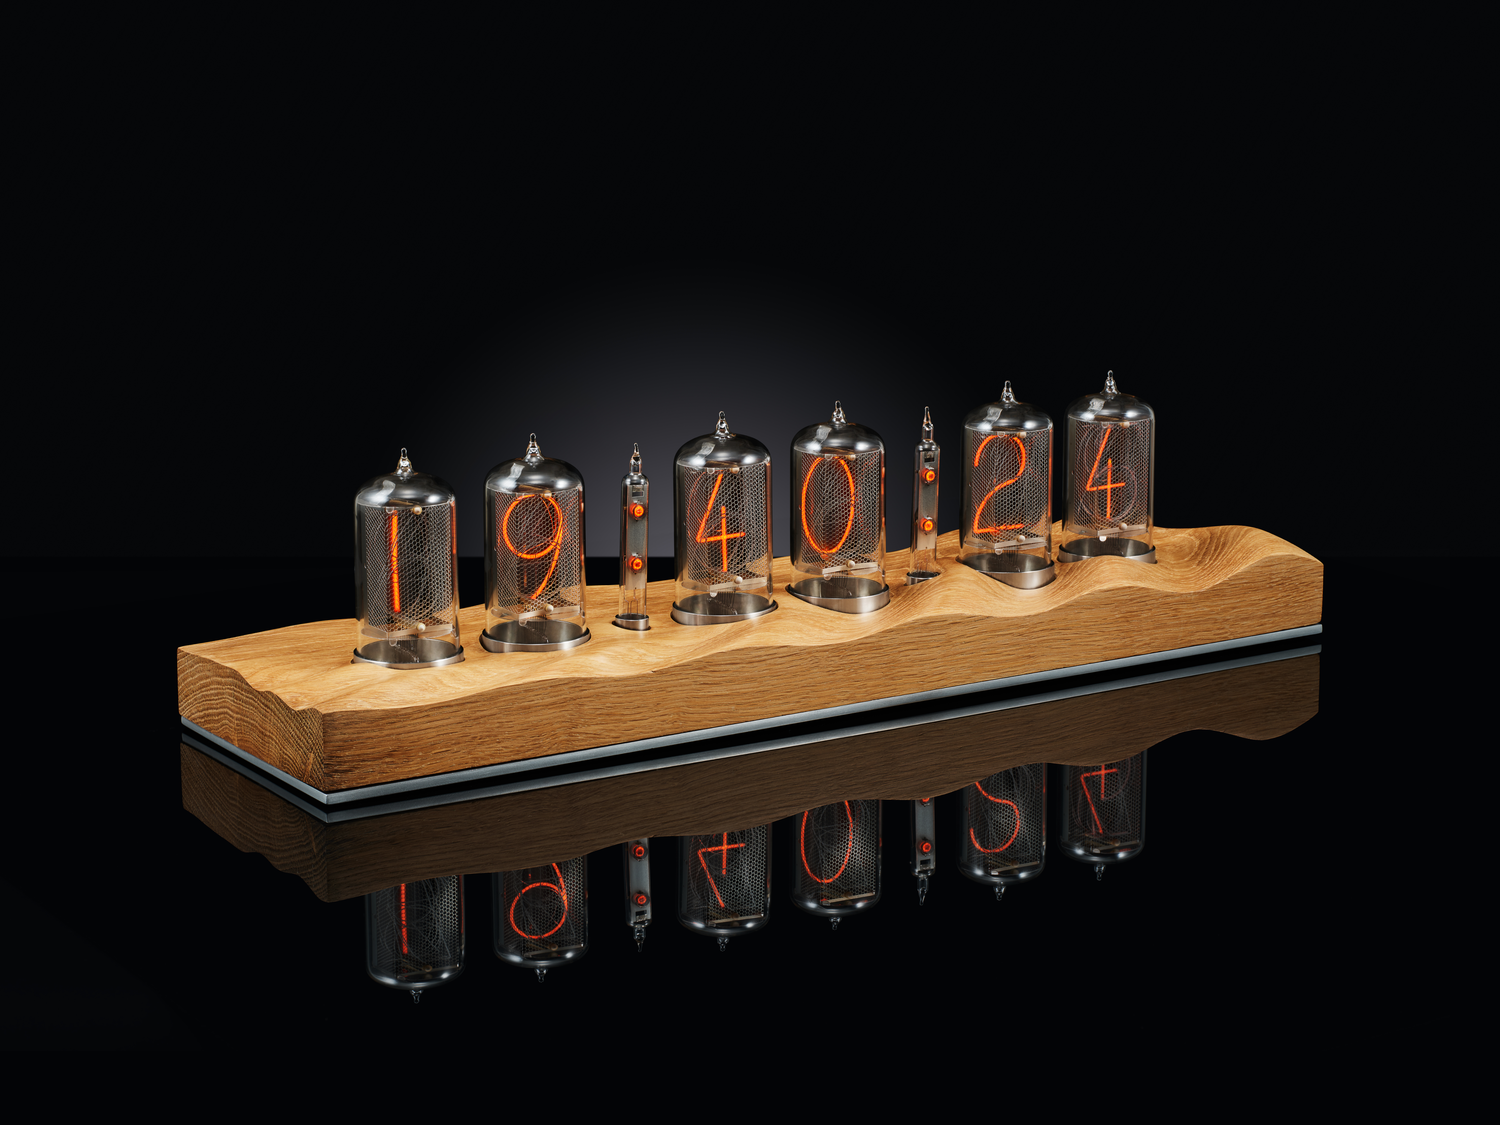
Oak Nixie Clock
This nixie clock pairs precision electronics with a carved base of solid English oak, shaped by a flowing wave pattern unique to each piece. The result is a refined, sculptural object that quietly draws the eye.
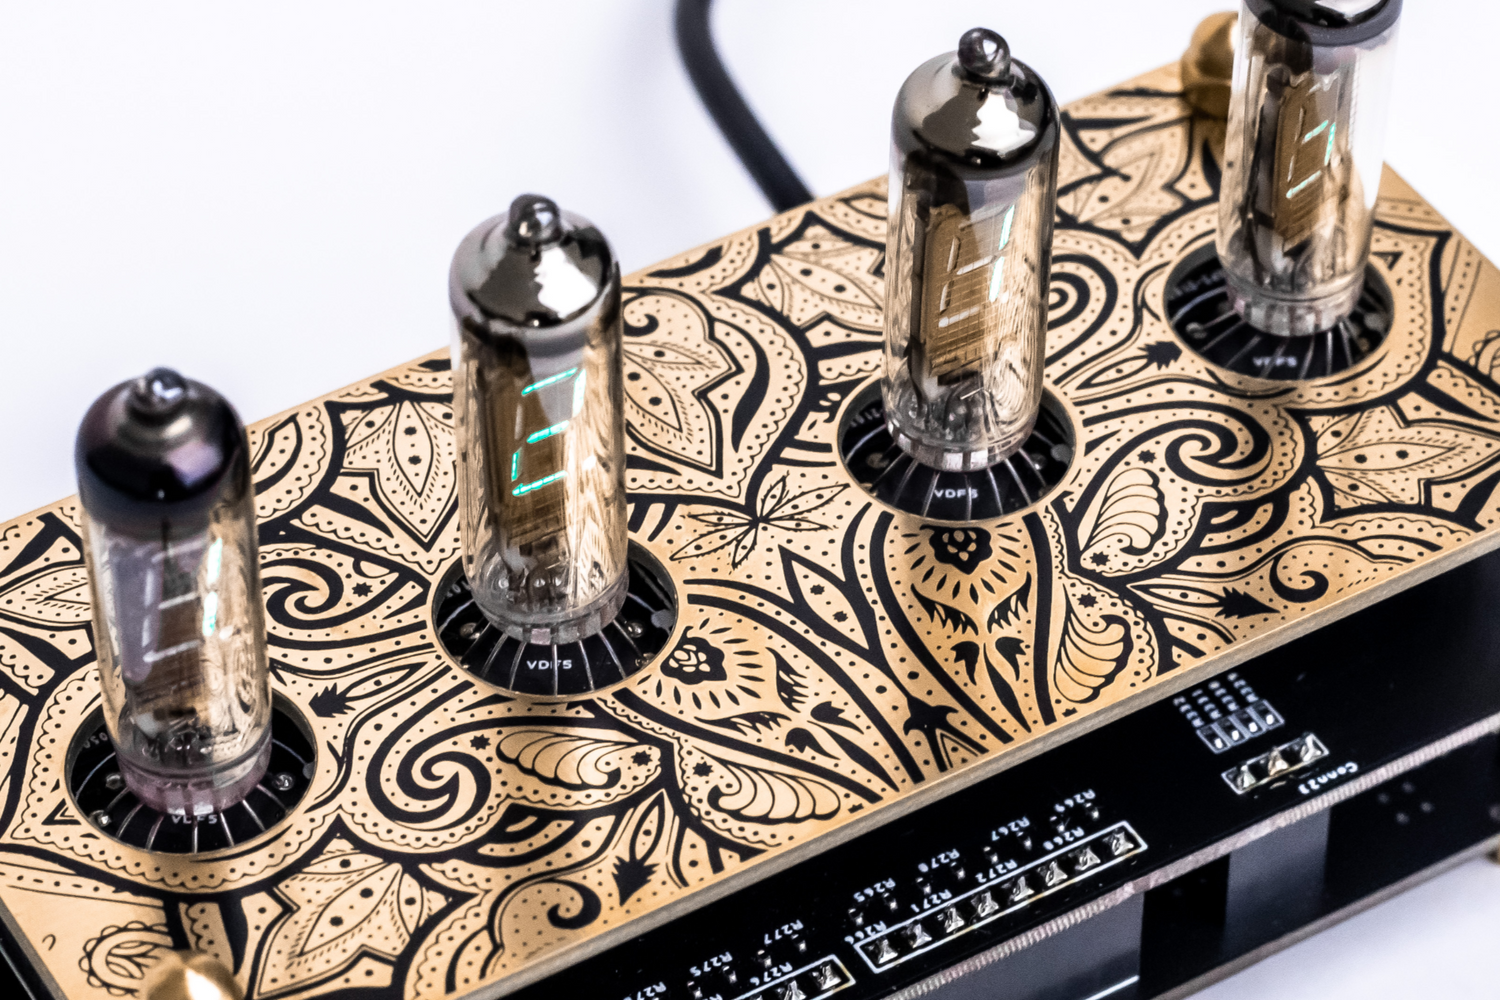
IV-3 Clock Kit
This unique desk clock showcases exposed electronics and PCB art, built with vintage IV-3 VFD tubes. Originally funded on Kickstarter, it's sold as a self-assembly kit and now resides in hundreds of homes.